December 14, 2011

How to: Brown Onions

Carrots, onions and celery are the base if you want to make soup. Browned onions are the base if you want to make a curry.  Some people brown the onions just before they start to make their curry, others (like myself) tend to make a large amount of the base beforehand and freeze it in small packs. I'm always looking to save time in the kitchen and by having the onions pre-cooked shaves 20 minutes off of my cooking time.  Also, by making the onions in big batches beforehand, I reduce the amount of onion stink in the house..BONUS!

I remember as a kid, my mom would gather the troops, meaning me, my sister, and my grandmother, and we would sit at the kitchen table and peel and chop 50 lbs of onions.  My dad would then hook up the gas stove in the garage and my mom would cook the onions in a HUGE pot over the fire.  Once the onions reached the right texture and colour, the onions were cooled, blended in the food processor and then put into neat packs and stocked in the freezer.  Those onions would usually last about 3 months and then we'd have to start the whole process over again.

Now I'm not crazy to handle 50 lbs of onions all by myself! I stick with 6 lbs-10 lbs at a time, use 2.5 hours making/watching/stirring the onions and then the rest of the day is spent airing out my home!

Browned Onions

Browned onions

6 lbs yellow onions, peeled and chopped
1 cup olive oil ( I know that sounds like a lot, but I generally don't add anymore oil to my dishes because the onions have enough to help with the cooking process)


6 lbs of onions BEFORE cooking
Pre-heat oven to 450 degrees.
In a large roasting pan, mix together the onions and oil.  Cover the roasting pan and place it on the lower rack of the oven.  Every 20-30 minutes give the onions a good stir.  After about 2-2.5 hours, the onions should be a rich brown colour and the quantity reduced by half.

Cool the onions down for 20 minutes.  In a food processor, blend the onions to a somewhat chunky paste. Scoop out the paste into small freezer friendly dishes to stock in your freezer.

When you're going to make your curry, you'll want to take out a dish of browned onions 5-6 hours in advance and let it defrost on the counter.

My Measurement notes:  1-2 heaping tablespoons onion paste  = 1 uncooked onion


December 10, 2011

'Tis the season to get sick

With the stresses of daily life and the change in weather, people are starting to fall sick with the cold and flu. I've been stuck with this "light" cold for a while now. It started off as a runny nose and some sneezing and then slowly progressed into a thick feeling in the throat.  For a few days I had a raspy, hoarse voice and then it went away, but I have a feeling that it is on its way back for another visit.

My mom gave me a recipe that was passed along to her by an aunt of mine.  It's a mixture of hot water with fresh lemon, honey and cinnamon. It's supposed to help boost your immune system and combat colds (**do remember that if you are sick, you should go and visit your doctor and seek his/her advice**).  Because I was so miserable, I thought I'd give it a whirl and I think it's what gave me my voice back.

I played around with the ingredient proportions until I found something I liked.  You can change the proportions very easily if you want a stronger or milder flavour.

Hot Lemon Water with Cinnamon and Honey


1 cup boiling hot water
1/2 or 1 slice of fresh lemon
1/8 tsp ground cinnamon
1 tsp honey

Boil water as you would for tea.  Put the lemon, cinnamon and honey in a heat-proof cup. Pour hot water into the cup and give it a stir.  Snuggle up in bead with a good book and drink away!

A note:  If I make a second cup for myself, I use the same lemon slice and just add the cinnamon and honey.

November 29, 2011

Eid Treats # 2: Coconut Macaroons


I don't know about you, but I have some recipes that cannot be shared here on the blog. They are so top secret, that only a few pairs of eyes have ever witnessed their birth in my kitchen.  People have asked me for the recipes and I have to politely decline. It's not that I purposely want to be mean; it's just that some of them are my special signature desserts and I want to keep them close. If I passed out the recipes to every person on the street, that "special-ness" would dissipate.

I'm not the only one who feels this way. Many friends and family that I know like to keep one or two recipes secret. There are even bloggers out there who openly admit that they will not share everything with their readers.  One such blogger is Gesine from Confections of a (Closet) Master Baker.  I came across her blog after reading her book "My Life From Scratch." Gesine works magic in her kitchen and spices up her blog entries with snarky, in your face commentary that will keep you on your toes and coming back for more.

Getting back to recipe protection, Gesine made a name for herself by baking up delicious French Macarons. On her blog, she notes that a guy named Gary e-mailed her and asked her for the recipe. Did he HONESTLY think she would give him the recipe that gave her her livelihood?    DUH!  Instead, she gave him a coconut macaroon recipe to try.  I ran with it and tweaked it ever so slightly (instead of vanilla extract, I used vanilla bean paste so there were millions of tiny vanilla bean specks running throughout the macaroons).  The next time I make these babies, I'd probably cut down on the sugar or used unsweetened coconut and let them brown up just a tad more.

Coconut Macaroons

Scooped macaroons ready to go into the oven

4 egg whites
3 1/2 cups sweetened shredded coconut
3/4 cup sugar
1 tsp vanilla bean paste
1/2 tsp salt

Preheat oven to 300 degrees.

Combine all ingredients into a heatproof glass or metal bowl and set atop a pot of simmering water (about 1-2 inches of water in the pot).

Make sure the bottom of the bowl does not come into contact with the simmer water.  Stir the mixture occasionally, ensuring to scrape the bottom of the bowl, to prevent ingredients from burning.

After approximately 10 minutes, the mixture should be hot and slightly thickened.
With a medium or large cookie scoop, drop batter onto a parchment-lined cookie sheet and bake for 15-20 minutes until edges are golden brown.

Cool for a few minutes on the cookie sheet, than remove using a offset spatula to a cooling rack.


**UPDATE DECEMBER 6, 2011


I asked Gesine the best way to store the macaroons so they don't dry out. They last for one day outside, but if you find yourself not eating all of them at once, put them in the freezer. When you are ready to eat them, thaw them out and warm them in the oven. The macaroons will last for a little bit less than a month if stored properly in the freezer.
-

November 16, 2011

Dried Fruit

This Eid went by in a blur. We flew in to TO, blinked our eyes, and bam it was over! Seriously, as soon as we got off the plane, it was like we hit the ground running. Every single day there were things to bake, gifts to buy, home to clean, clothes to iron, people to call, and appointments to go to. It almost felt like we didn't have a chance to sleep, eat, or breathe. I still don't know how I managed to get to the gym to work out.
And because everything was a blur, I didn't get an opportunity to blog about the treats I made until now.


First, I must inform you that the pictures in the next few posts were taken from my iPod and tweaked using Instagram.  I left my camera back in LA and had to make due with some grainy shots.  Oh well....

This first treat is so easy to make, you can do it blind folded (but you really don't want to do that because you might burn yourself and/or the chocolate).


Dark Chocolate Dipped Dried Apricots


20-30 dried apricots
1 bar Lindt Excellence Madagascar 65% Dark Chocolate, broken into small pieces
1/2 cup sliced almonds, crushed into small pieces

Line a baking sheet with parchment and set aside.  Place the crushed almonds in a bowl and set aside.

First, get a large pot and fill it with 1 to 2 inches of water and place it over low-medium heat until the water begins to simmer. Take a glass or stainless steel bowl that has a diameter larger than the pot and place it on top.  Make sure the bowl doesn't touch the simmering water. Place most of the chocolate (three-quarters worth) in the bowl and let it melt, while stirring occasionally. Once the chocolate has melted, remove from heat and stir in the remaining chocolate until melted.

Take the dried apricots and dip them half-way into the melted dark chocolate.  Then roll the apricots in the crushed almonds and place them on the parchment-lined baking sheet.

Once the chocolate has set, about 20-30 minutes, place the apricot pieces into cellophane bags and tie with ribbon if you want to give them as a gift, or place them in an air tight container. 


November 9, 2011

Apple Pie Pockets

YOU Can't Reach For Anything NEW If YOUR Hands Are Still Full of Yesterday's JUNK. ~ Louise Smith

If you're just tuning into my blog, or are getting to know me personally, there is one thing you should know about me. I am an obsessive quote collector.  I always travel with some paper and a pen just in case I come across a quote that I want to add to my collection.  I pin quotes on my Pinterest board, clip them from magazines, calendars, books, and newspapers, tag and share them on Facebook, and write them down in my very own quote book.  I started that quote book after my father passed away in December 2009 after discovering quote clippings in his wallet.

Quotes, whether they be one sentence or an entire paragraph, speak volumes and have the power to shift your mood. Sometimes those words running across the page give you advice that no friend or parent could give. They shed light on difficult situations, help you gain perspective, and analyse things from a different point of view. Simply put, I love quotes. And the fact that my father collected quotes too makes me feel connected to him even more.

~*~*~*~

Growing up, my mom and I would go grocery shopping on Saturday mornings. As soon as the store would open, we would get what we needed and be home before the weekend shopping rush would start.   Sometimes, my dad would come along, or would get some things from the store the night before.  And almost always he would buy danishes, donuts or apple pie for us to enjoy. Now whenever I see danishes, apple pie, or coconut covered donuts, I remember him.  

In October, Loblaws was selling PC's apple-shaped pocket pie maker, and because apple pie is near and dear to me, I picked one up and all the ingredients listed on the box to make these cuties.

Apple Pie Pockets


3 Gala Apples, cored, peeled and chopped into chunks (The original recipe called for Granny Smith, but I don't like Granny Smith so I used Gala instead)
1/2 cup granulated sugar
1 tbsp fresh lemon juice
1/4 tsp cinnamon
1 package of butter puff pastry sheets, thawed but cold
1 egg, beaten

In a pot, stir together apples, sugar, lemon juice, and cinnamon.  Let the mixture stand for 10-15 minutes or until some juice has been released.  Bring to a simmer over low-medium heat and cook for 10 minutes or until apples are tender and juices are thickened.  Chill for 1 hour.

Preheat the oven to 375 degrees and line a baking sheet with parchment.

Unroll one sheet of puff pastry onto a lightly floured surface. Using the apple pocket pie maker, cut four apple shapes using one side of the pie maker. Repeat with other side of closed apple pocket maker and additional sheet of pastry.  There will be 8 pieces- 4 bottoms and 4 tops with the vent.

Open apple pocket pie maker and dust slightly with flour. Gently press in one of the dough cut outs. Fill centre with 1/4 cup of cooled filling. Brush edges of dough lightly with beaten egg. Lay vented dough cut out over top, lining up edges; press mold shut to seal edges.  Lay finished pocket onto prepared baking sheet, vented side up.  Repeat for each pocket.  Brush tops of pockets lightly with beaten egg.  Bake for 20-25 minutes or until the pocket is evenly golden and crisp.

**Some notes:

If you don't have the pocket maker, you can create free-form shapes with puff pastry and stuff it with the apple filling.
If you don't want to make all of the pie pockets, DO NOT brush the tops of the pies with the egg. Instead, layer the pies between waxed paper, put them in freezer bags and stick them into the freezer for a later date.  I wouldn't keep them in the freezer for more than one month.


November 1, 2011

Palak (spinach)

I love palak! It's really healthy and can be made in so many different ways.  This recipe is actually for Palak Paneer, but because I don't usually have Paneer (soft Indian cheese) in my fridge, I excluded it from this dish.


Palak Paneer without the Paneer


4 packets chopped frozen spinach, thawed in wrappers
5 Roma tomatoes, washed and diced
6 green chilies, washed and chopped
1 onion, diced
2 tbsp olive oil
2 tbsp fresh garlic, minced
2 tbsp fresh ginger, peeled and minced
1 1/2 tsp garam masala
1 tbsp dried Kasur Methi (fenugreek leaves)
6 tbsp 2% milk
cayenne pepper to taste
salt to taste
water (optional)

Place thawed spinach in a mesh sieve or small-hole colander to drain out excess liquid.

In a large pot or sauce pan, cook diced onion in olive oil over medium-low heat until golden-to-dark-brown. Be careful not to burn onions.  Add minced garlic, ginger, chilies and cook for 1-2 minutes. Do not leave the stove! Stirring is very important here because minced garlic has a tendency to burn.  Once the garlic has taken on a slightly pink hue, toss in the tomatoes and fry them until some liquid is released.  Add in thawed spinach and the dried fenugreek leaves and cook for a few minutes while stirring frequently.  Add salt and cayenne pepper to taste ( tip: start off with 1/2 tsp each and increase the amount as the spinach cooks down).   If you find the spinach is sticking, add 1-2 tsp of water.   Stir in the garam masala powder and milk and turn the heat to low, cover the pot with its lid and let the spinach steam.   At this point, it's all about taste and texture and that means taking a spoon and taste-testing to see if the spinach is cooked through and has all the flavours.


Once the spinach is cooked, it'll look like one big chunky mess.  Let it cool slightly and then scoop it out into a food processor.  Spin it around in there until most of the ingredients have been pulverized. The result should be smooth yet slightly chunky, greeny goodness.  Serve with hot, buttery naan!

October 30, 2011

Low Fat Mini Pumpkin Muffins with Pepitas

Recently, I had another "first-time" food experience. This time it was with pumpkin.  Back in the day, and I'm talking way back in elementary school...grade 5 to be precise, was the last time I had had any experience with pumpkins.  It was in Mr. McFarlene's class and we were carving pumpkins for Halloween.  Now, we didn't really celebrate Halloween, but because this was a class activity, my parents let me drag a pumpkin to school and carve it with my classmates. I remember sticking my hand inside my pumpkin and feeling all of the gushy, thready goo, and giggling/cringing as I scooped out the seeds and flesh until the insides were smooth.  I was no artist, so I drew out a very simple Jack O' Lantern design- a face with a very toothy grin.  After school, I dragged the pumpkin back home and planted it on the front porch. When my dad came home that night, we lit a candle and put it inside the pumpkin and had that stupid grin shine up on the wall.  Ahh...life was so simple back then......

Flash forward a "few" years (ahem..) and pumpkin has re-entered my life yet again. This time in the form of a can.  I thought I would have to cut, clean out, and cook a pumpkin to make this, but luckily this recipe from Gina's Skinny Recipes called for good ol' canned pumpkin puree. The first time I tried this recipe, I followed it to a T.  Unfortunately, I found the taste to be very OVERWHELMING because of the amount of pumpkin pie spice used. The second time I made them, I cut the pumpkin pie spice in half and found the flavour to be much more appetizing.  If you like your pumpkin baked goods to be very spicy, go right ahead and use the original measurements. But if you want a more delicate taste, use the measurements from below.

Low Fat Mini Pumpkin Muffins with Pepitas


1 1/2 cups canned pumpkin puree
1 1/4 cups Nutri-Blend flour (same as white whole wheat flour)
1/2 cup sugar
1 tbsp baking soda
1 tsp pumpkin pie spice
1/2 tsp nutmeg
1/4 tsp cinnamon
1/4 tsp salt
2 tbsp oil
2 large egg whites
1 1/2 tsp vanilla extract
2 tbsp pepitas

Preheat oven to 350 degrees.  Spray mini muffin tins with some oil.

In a bowl, combine flour, sugar, baking soda, pumpkin spice, nutmeg, cinnamon, and salt.  Set aside.
In a large bowl beat together egg whites, pumpkin puree and vanilla at medium speed until thick.
Add flour mixture and mix at low speed until wet and dry ingredients are just combined.
Scoop out batter into mini muffin tins using an ice cream scoop.  Sprinkle pepitas on tops of muffins and bake on the centre rack for 8-10 minutes, or until a toothpick inserted in the centre comes out clean.  Remove muffins and place on cooking rack.

October 20, 2011

A first for moi: the S'More

When my parents immigrated to Canada over 40 years ago, they came with the clothes on their backs, a little pocket money, and plenty of hopes and dreams.  They worked hard, and raised and educated three kids all the while discovering and creating a unique cultural identity- a Canadian Pakistani Muslim identity.  They meshed together bits and pieces from Canadian and Pakistani societies that would enable them to create this identity, this culture without compromising on their religious values. Essentially they took parts of Canadian and Pakistani cultures that would compliment Islamic culture and belief and created a wonderful cohesive mix.

Now in terms of food, Pakistani cuisine won hands down. It took my mom several years before she started experimenting with ingredients and recipes that didn't stem from the sub-continent. She's an awesome cook and I think I get my "let's try something new, or let's combine these different flavours together and see what happens.." thought process from her.  Still, there are some "exotic" fruits and veggies that haven't made their way into her tummy or kitchen, but they have in mine. Spaghetti squash, rhubarb muffins (thanks Linds!), kale, star fruit, baby buk choy, anchovies, pumpkin, calamari, lobster, chives..really the list is endless. Some of you may be scratching your heads and thinking...Hinna, these ain't exotic.  Trust me...in a home of Pakistani heritage..these ARE exotic! lol

This blended culture that we grew up with also shaped the types of familial activities that we would enjoy. We swam, skated, played soccer and street hockey, rode our bikes, roller bladed, skied and skipped. But, we never went camping, or had a clue about what a cottage was until later on in life.  I am proud to say that we have been to a cottage and do know what it's used for! :p  I'm not sure if I'm up for camping, but I am excited to say that I finally tasted the quintessential camping treat.....the S'MORE!  Taking inspiration from Ina Garten's adult s'more, I was able to recreate this treat in my kitchen with my gas stove!

S'Mores


1 package of cookies that have one side coated with plain chocolate
1 small package of halal marshmallows
long wooden skewers


Turn on your gas stove burner onto low. Lower a skewered marshmallow close to the flame until the marshmallow begins to melt and turn brown.  Try to keep the marshmallow from burning or carrying a flame.  Place the melted marshmallow onto the chocolate side of one cookie. Create a sandwich by squishing down another cookie, chocolate side down. Follow the same process and make as many s'mores as your heart desires!


October 10, 2011

Red Pepper Quinoa Cakes

This has probably been the warmest Canadian Thanksgiving long weekend I can remember.  Everyone had a chance to get rid of their sweaters and jackets, roll up their shirt sleeves and bask in the warm glow of the sun.
It's supposed to warm up even more today, so it looks like I'll be wearing sandals when I head out. :o)  

I recently purchased some organic quinoa and quinoa flour for some recipes, but silly me, I forgot my quinoa cookbook back in LA.  After searching for a bit on the Internet, I came across this recipe from the Cooking Quinoa site.  The first time I made the cakes, the only ingredient I changed was the organic corn- I used diced red pepper.  The second time I made the cakes, I added more spices because I found that the original recipe didn't have enough flavour.

Red Pepper Quinoa Cakes


2 cups cooked organic mixed quinoa (you can use yellow quinoa if you can't find one that is mixed)
1 red pepper, finely chopped by hand or in a food processor
3 tbsp fresh parsley, chopped
1 tbsp fresh chives, chopped
1/4 cup breadcrumbs
2 shallots,  finely chopped by hand or in a food processor 
2 tbsp whole wheat flour
2 eggs, beaten
1 tsp sea salt
1 tsp black pepper
1 tsp cayenne pepper
1/4 tsp chili flakes
1/2 tsp paprika
t tbsp olive oil
tsp balsamic vinegar
1 shallot, chopped
1 tsp freshly minced garlic


In a medium-sized bowl, combine cooked quinoa, chopped red pepper, 2 tbsp parsley, chives, breadcrumbs, shallots, and flour.  Mix until combined and add eggs, sea salt, and spices.  Form the mixture into small patties.   Heat a skilled to medium-low. Add the olive oil to the heated pan and cook patties 5 to 7 minutes per side.  Drain on paper towel and repeat with remaining patties.

In a small bowl, combine tomatoes, vinegar, shallot, garlic and parsley.  Mix well.  Serve on the side with the quinoa cakes.


October 5, 2011

A breakfast time saver!

I don't know about you, but I'm finding that I don't have enough hours in the day to get things done. It seems like I blink my eyes and three hours have gone by!  There is so much to get done: I have a stack of books to get through, some unit plan designing to complete, prayers to read, and online classes to attend. Not to mention the daily household chores that must get done after work and daily trips to the gym.

 I know if I manage my time a bit better ( I blame it on no longer having a steady work routine!!), I would be able to complete many of these tasks.  From the minute that I wake up to the time I go to bed, I have to make sure I am not wasting any time.  I'm hoping to start off with a simple breakfast routine on days that I know I will be extremely busy.  I whipped up a really simple breakfast parfait this morning to kick start my day.  Since there is a lot of protein in the Greek yogurt, I felt full and satisfied. If you think this isn't enough for you eat a boiled egg on the side.


Breakfast Parfait


2 scoops PC 0% Honey Greek Yogurt
1 large stem of Seedless Organic Coronation Grapes
3 tbsp PC Blue Menu Raisin & Almond Granola

Place a scoop of yogurt in the bottom of a wide-rimmed glass.  Layer on some grapes and 1 tbsp of granola. Create a second layer of yogurt, grapes and granola.

October 4, 2011

Brown Sugar Pound Cake

I've always been a fan of Martha Stewart. I don't know exactly when I fell in love with her shows on The Food Network, maybe my last year in high school? Anyhow, I loved her so much that I would plan my schedule around her show and on the off chance that I wasn't at home, I would tape the show to watch at a later time.  I was such the die hard fan, that when I got married, I made sure that R got the cable package that had the The Food Network in its list of channels.  And when Martha Stewart transitioned into the daytime talk show/craft show/food show scene, I, like many of her fans, made the transition with her.  I watched her for several more years until she annoyingly moved her show to a specialty channel and that's when I got cut off. :o(

So now instead of watching her and writing down her recipes, I go to her books for inspiration.  One that I keep handy is Martha Stewart's Cupcakes. It is filled with 175 wonderful cupcake recipes for all sorts of occasions.  What's also great is that just by switching the baking pan, these cupcake recipes can easily become cake recipes.

One of my go-to recipes in the book is the Brown Sugar Pound Cake.  It's got the texture of the classic pound cake but with a nutty, caramel-like taste. It's a very simple recipe to follow and can be made the night before a party or the day of.  I baked this cake the night before a sisters-only event with Shaykh Yahya Rhodus at the Seeker's Hub two weeks back and if I do so say so myself, it was mighty tasty! Instead of using all purpose flour, I used cake flour and this simple change made the cake very light.  If you want to stick with the original recipe, substitute in the all purpose flour for the cake flour.


Brown Sugar Pound Cake


3 cups cake flour
2 tsp baking powder
1/2 tsp salt
1 cup unsalted butter, room temperature
2 cups light-brown sugar, packed
4 large eggs, room temperature
3/4 cup buttermilk

Preheat oven to 325 degrees.  Butter and line 2  8`` or 9`` cake pans with parchment paper or butter 1 Bundt pan.

In a bowl, mix together flour, baking powder and salt and set aside.

In another bowl, cream together butter and brown sugar until pale and fluffy. Add eggs and beat until well incorporated.  Add flour in three batches, alternating between 2 additions of buttermilk, beating until combined after each.

Divide the batter evenly between to two lined cake pans and bake with the rack in the centre of the oven until the cake is golden brown and a cake tester comes out clean.  Cool in pan for 5 minutes before transferring cakes to a cooling rack.

September 20, 2011

Gifts and Cookies


Back in high school and university, I used to spend a lot of time customizing gifts for my friends and family.  I would carefully plan out the gifts by creating detailed shopping lists that listed gift ideas and wrapping for each individual.  Yes, I spent more time planning gifts than studying...my Managerial Accounting mark can attest to this!! heh.

Sadly, I no longer spend that much time on picking out the perfect gift. Nowadays, I have to bounce ideas off of other people, give cash, or resort to gift cards. This Eid I really struggled to find things for family members and ended up getting some gift cards. I did however, try to add a personal touch by adding a homemade cookie mix to the gifts.  This idea stemmed from Bakerella's post on Mixing things up!

This is probably the simplest gift you can make. It's not too expensive and you can customize it by using different coloured Smarties or M & M's, or using different nuts.  Get a mason jar and slap on two printable labels- one for the name and the other for directions and voila! You have a great hostess or holiday gift.

*Note that the label in the picture has wrinkles in it...to avoid this, use smaller labels

Chocolate Oatmeal Cowboy Cookies


1 1/3 cup all purpose flour, spooned into measuring cup and levelled
1 tsp baking powder
1 tsp baking soda
1/4 tsp salt
1 cup cooking oats
3/4 cup Smarties (you can use M & M's if you are celebrating a holiday)
3/4 cup semi-sweet chocolate chips
1/2 cup brown sugar, packed
1/2 cup white sugar
1/3-1/2 cup chopped pecans


Before you start the layers, mix the flour, baking powder, baking soda, and salt in a bowl together.

The layers will be as follows:
1.The flour, baking powder, baking soda, and salt mixture.  .
2.The oats.
3.The Smarties.
4.The chocolate chips.
5.The brown sugar.
6.The white sugar.
7.The chopped pecans

Pack each layer down tightly so that you can fit all of the ingredients in.  If a plastic seal is missing from the mouth of the jar, take a small piece of plastic wrap and cover it up, before closing the lid.
Using printable labels, you can print out two labels- one label for the cookie name, and the other for the instructions.  I put the name of the cookie at the front of the jar, and put the instructions on the back.  Here are the instructions I used on the label:

Directions

Preheat oven to 350 degrees.
Stir dry ingredients in a large bowl and add:
1/2 cup butter, (almost melted), 1 slightly beaten egg & 1 teaspoon vanilla extract
Combine thoroughly. Roll into 1 1/2 inch balls & bake on a lined cookie sheet for 10 minutes.

If you want to make the cookies for yourself, the recipe is as follows:

1 1/3 cup all purpose flour, spooned into measuring cup and levelled
1 tsp baking powder
1 tsp baking soda
1/4 tsp salt
1 cup cooking oats
3/4 cup Smarties (you can use M & M's if you are celebrating a holiday)
3/4 cup semi-sweet chocolate chips
1/2 cup brown sugar, packed
1/2 cup white sugar
1/3-1/2 cup chopped pecans
1 egg, slightly beaten
1/2 cup butter, melted
1 tsp vanilla

Preheat the oven to 350 degrees.

Mix all of the dry ingredients in a large glass bowl.  Add in the wet ingredients and mix well.  Roll the dough into small balls, and place them, evenly spaced, on a parchment-lined cookie sheet. Bake for 10 minutes or until the edges are golden. Cool for 5 minutes on cookie sheet before transferring to cooling rack.

September 2, 2011

Eid bits and bobs and amazing sugar cookies!

Eid Mubarak to those who were celebrating or are still celebrating (like moi) this week! Having Eid on a week day ensures two things: a day off from work and loads of parties on the weekends.

Our Eid week celebrations started on Monday night with a chaand raat party at my mom's home.  A chaand raat party literally means a moon night party- it usually takes place on the 29th night of Ramadan as this is the night that groups of leaders from the Muslim community gather around and try to locate and/or find out if anyone has spotted the moon. If a moon is spotted, the Islamic month of Ramadan will be complete and the next day will be Eid. Our chaand raat party consisted of breaking our fast, eating delicious food, having wonderful conversation, keeping tabs on moon sightings, and of course mehndi/henna application.  A chaand raat party wouldn't be a chaand raat party without some mehndi!


Our Eid celebrations on Wednesday started off with congregational Eid prayers at a local community spot.  Then we headed home to snack on some sweet treats.  The rest of the day was filled with gift-giving, spending time with family and visitors, visiting family and friends, eating, and the oh-so-important Eid nap!  Round two of Eid celebrations are starting up again and will continue well into the weekend.  Thank goodness it's a long weekend...we'll have Monday to recover from all of the food that will have been consumed!


I'm sure some of you will be heading out and visiting people this weekend and since you probably don't want to go empty-handed, I suggest you try making these sugar cookies. They are soft, not too sweet and very forgiving.  You can use different cookie cutters to cut out the cookies, or roll the dough into a log and cut off cookie coins with a sharp knife.  Do what your heart (and tummy!) desires.


Sugar Cookies

1-½ cup unsalted butter, room temperature
2 cups sugar
2 eggs, room temperature
2 egg yolks, room temperature
4 tsp vanilla extract
2 tsp almond extract
4 cups white whole wheat flour
1 tsp salt
1 tsp baking powder


In a large bowl, beat together butter and sugar until well combined. Add in the 2 eggs and 2 egg yolks and mix until combined.  Mix in vanilla and almond extracts.  In another bowl, sift together flour, salt, and baking powder.  Slowly add the flour mixture to the wet ingredients and mix until combined, making sure not to over-mix the dough.

To make a small quantity of cookies, halve the dough and shape them into discs. Wrap them up with plastic wrap and stick one disc in the fridge and the other in the freezer. Otherwise, put all the dough onto some plastic wrap and form it into a disc before placing in fridge for 2-3 hours.   One hour before baking, turn the oven heat onto 350 degrees.  Roll out the dough on a floured surface to 1/4-1-8 inch thickness.  Dip a cookie cutter into some flour and begin to cut out cookies. If the dough becomes warm as you work, wrap it up and stick it into the freezer for 15-20 minutes (continue this method if the dough continues to warm up). Place the cookies on parchment-lined, cold cookie sheets and bake for 6-8 minutes or until the cookies have golden edges. Between cookie batches, let cookie sheets cool completely before reusing.
Cool cookies completely on cooling racks before icing.


Icing

1 cup powdered sugar
1 Tbsp milk (use less milk if you want a thicker icing)
1 drop fresh lemon juice
1 Tbsp light corn syrup


In a small bowl, whisk together all ingredients.  Using the tinges of a fork, drizzle the icing over cooled cookies.  Let icing set before layering cookies on a tray otherwise the cookies will stick together. (I learned that the hard way!)

August 26, 2011

Ramadan # 7 Lemony Fruit Salad Ice Pops


Today marks the last Friday and the 27th night of Ramadan. I feel like I'm about to say good by to a close friend who is leaving in a few days time and will not return for another year. And who knows what will happen in a year's time...who will be here and who will have departed. :o(  Let's all try to make the best of the time we have left with this blessed month.

------------------------------------------------------------------------------------------------------------
The summer is winding down and school will be beginning (or has already started in some places) very shortly. It would be around this time that I, along with my teacher friends, would be opening up boxes and setting up our classrooms for another school year. This would also be the time for last minute weekend getaways, parties, trips to the CNE and of course eating lots of ice cream and popsicles!

I have been noticing that some food trends from the 80s and 90s are making a come back, one of them being making homemade popsicles with plastic molds.  I remember when we were selling my parents' home, my mom and I had come across some plastic popsicle molds in one of the boxes and we decided to donate them- now I wish I had kept them because it would have saved me from spending $15 bucks on new molds. Oh well....

This recipe (from the Everyday Food Special Issue) I'm going to share with you is full of sweet and delicious seasonal fruit and tangy lemonade. I cut the recipe in half from 8 popsicles to 4.

Lemony Fruit Salad Ice Pops


1 ripe peach, washed and cut into 1/2-inch slices
1 golden kiwi, washed, peeled and sliced into 1/4 inch rounds
1/4 cup of blueberries, washed
1 frozen lemonade concentrate (the recipe used apple juice)

Follow the instructions on the frozen lemonade concentrate to make lemonade.  Arrange some fruit into 4 3-ounce ice-pop molds, making sure that the pieces fit snugly.  Pour enough lemonade into the molds to just cover the fruit.  Insert the ice-pop sticks and freeze for at least 6 hours.  To release the pops, run hot water over the frozen molds until it releases.


August 22, 2011

Ramadan # 6 Pizza, let me count the ways how I love thee!

O Lord, I seek Your forgiveness for every sin that I reproached or condemned one of Your creation for committing but then myself plunged into and brazenly committed before You.

I cannot believe we are into the final 10 days of Ramadan! Where did the month go?  Is it just me, or is time slipping by WAY TOO FAST!?  It seems like last week summer started, and then Ramadan came and now both are leaving us very shortly. *sigh*


To mark the last 10 days of Ramadan, Muslims are spending their days and nights in prayer, reflection, and remembrance of God. Since, many of us are staying out of the kitchen to focus on these activities, I wanted to share with you a simple recipe that won't take up too much of your time. Put aside the stews and curries, and bring on the pizza!

To put it simply, I love pizza! And I love making it at home! Depending on my mood, I get to experiment with different combinations of meats, spices, cheeses and vegetables that tantalize my taste buds. Ahh...my mouth is watering just thinking about that doughy goodness!

This recipe calls for freshly mixed pizza dough that should (if you want to read about my inability to find pizza dough in Pasadena, click here!) be available in your grocery store's bakery.  None of that pre-baked, cardboard-like pizza crust, okay?!

The base of my pizza is a meat sauce.  I either cook lean ground beef on the stove or use my dum keema recipe, and add a canned tomato sauce. I usually use Hunt's roasted red pepper or garlic tomato sauce.  I add some more spices- salt, chili flakes and sometimes some ground coriander.

The rest of the toppings consist of a variety of vegetables, sun dried tomatoes, jarred olives and hot peppers, and cheese!


Whole Wheat Pizza


1 pre-mixed whole wheat pizza dough, or you can make your own if you wish
1 large Hot House tomato, washed and sliced into circles
1 medium yellow onion, peeled and sliced
10 cremini mushrooms, washed and sliced
1 green pepper, washed and sliced into strips
1 red pepper, washed and cut into strips
handful of sliced and pitted green olives
handful of hot peppers
a few pieces of sun dried tomatoes, drained of oil
1 to 1 1/2 cups of shredded cheddar cheese
prepared meat sauce
1 tsp of corn meal
1 tbsp olive oil

Preheat your oven to 400 degrees.

Follow the pre-mixed pizza dough thawing instructions as some require the dough to come up to room temperature in the bag before using.

Spread oil over a round pizza tray and sprinkle it with corn meal. Stretch the pizza dough over the tray, making sure that it is stretched evenly and the crust is even all the way around.  Layer on the meat sauce and then add the vegetables.  Sprinkle the shredded cheese on top of the pizza and place the tray into the centre of the oven for 20-30 minutes or until the bottom of the pizza is cooked.  I also like to check the centre of the pizza as sometimes it can become soggy. If you find that this is happening, leave it in for another 5-10 minutes.


August 15, 2011

Ramadan # 5 Dum Keema (Steamed Ground Beef)

Oh Allah, please accept our fasts, prayers, and acts of charity during this blessed month.

Today is the 15th fast of Ramadan- the halfway point. I cannot believe how quickly this month is flying by.  The days are long and at times challenging, but well worth it.  The physical and spiritual detoxification that is occurring is necessary to remove the build up of toxins from our bodies and hearts.  It is my hope that this detox doesn't end with Ramadan, but continues throughout the year in some way.

Creating meals for your families while fasting can be a challenge because you can't taste anything to check for spice and flavour.  As a result, I have started cooking after iftar (after I break my fast at sunset).  I don't want to be slaving over the stove for a long time because I need to go to the mosque to pray taraweeh, so I like to make meals or parts of meals that are easy and quick to prepare.   

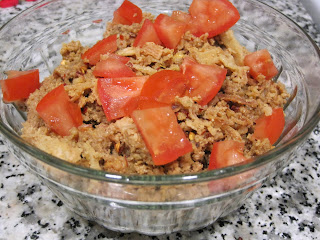
Dum keema is very versatile. It can be eaten by itself, put into sandwiches, tacos, pasta dishes or on pizza.  It is very easy to prepare and uses ingredients that you probably already have at home or can easily purchase at your grocery store.

Dum Keema


3 heaping tbsp chicken tikka masala spice
pinch of salt
1 cup low fat, organic yogurt
1 heaping tbsp each, freshly minced ginger and garlic
6 tbsp fried onions (these onions come prepackaged and are available at Indian grocery stores and the Indian section at No Frills or Loblaws)
2 lb lean ground beef, washed in a mesh sieve and drained
red chili flakes (optional)
diced tomatoes and fried onions for garnish


Preheat oven to 350 degrees.

In a medium-large bowl, mix together chicken tikka masala, yogurt, salt, garlic, ginger, and fried onions. Add in the ground beef and using your hand (or a spoon if you don't want to touch the meat), thoroughly mix together the yogurt-based masala and meat.  Once mixed, pat the meat down into a roasting pan (the pan should have a lid) into a thin layer.  Place the pan with the lid on, into the oven.  Let the meat "steam" for 15-20 minutes before taking the lid off to stir the meat.  You will notice the meat will break into big chunks, using a wooden spoon, break these chunks into small pieces.  Replace the lid and let the meat cook for another 10-15 minutes or until the meat juices have disappeared.  

Place the dum keema into a glass dish and garnish with some friend onions, red chili flakes and diced tomatoes.

August 11, 2011

Ramadan # 4 Green and Gold Kiwifruit Salsa

O Allah, I seek your forgiveness for every sin that my soul made seem to me trivial and small, and continued to make seem insignificant, until it finally entangled me in it.
While entering the grocery store last week, I came across a stand displaying gold kiwifruit.  What attracted me to the stand wasn't the actual fruit, but the freebies sticking out of a pocket below! Inside the pocket were these plastic wrapped green spoons/knives with the words "Cut and scoop" on them.  After closer examination, I discovered that the green spoons/knives were for the kiwifruit. Normally I use a regular knife to peel my kiwifruit and eat it. But this spoon/knife was taking me in another direction.  The knife side is used to cut the kiwifruit in half and the spoon side is used to spoon out the kiwifruit so that you are left with a kiwi skin cup. Pretty neat eh?

Anyhow, I stuck a couple of those spoon-knife packets into my purse and continued to explore the stand.  I pulled off a recipe card (from Zespri Kiwifruit) for green and gold kiwifruit salsa. I was hesitant in trying the recipe out because I had never before tried gold kiwifruit. After a few minutes of deliberation, I decided to go ahead and try it out.  I picked up all of the necessary ingredients, did the rest of my shopping and came home.  

I didn't make the salsa right away because the kiwis weren't that ripe. It actually worked out for me because I had to make an unexpected trip back home, so the kiwis had a few days to ripen on my kitchen counter.  

Some info on kiwifruit (came off the back of the recipe card): -

-Kiwifruit are ripe when they give in to slight pressure.
-Gold kiwifruit will last 3-7 days at room temperature and 12-14 days in the fridge.
-Green kiwifruit will last 3-7 days at room temperature and 24-28 days in the fridge.
-2 kiwifruit have less than 100 calories, more than 230% of your daily Vitamin C and 16% of your daily fiber.
-Kiwifruit also have calcium, iron, Vitamin E, zinc, folate, antioxidants, magnesium, and potassium.


Yesterday afternoon I made the salsa (with some minor alterations to the original recipe) and after R and I broke our fasts, we tried it with corn chips and I have to tell you it ROCKS!!!! Slightly sweet yet tart and oh so yummy!  

Some notes:  I used the spoon and knife utensil to create kiwi cups and it isn't as easy as it looks.  After I made a few cups, I went back to using my knife. I think I would only use the spoon and knife utensil if I wanted to serve the salsa in the cups.

Green and Gold Kiwifruit Salsa


3 Gold kiwifruit (Original recipe said 4)
3 Green kiwifruit (Original recipe said 4)
1/2 large red onion, peeled and finely diced (Original recipe said 1 cup of diced red onion. I cut up the halves and put them into a food processor to save myself time and tears)
2 tbsp fresh cilantro/coriander, washed and chopped
1 tbsp fresh mint, washed and julienned
juice of 3 small key limes (Original recipe said 1 tbsp fresh lime juice)
1 tbsp ground cumin

Slice kiwifruit into halves and peel or spoon out the fruit onto a cutting board. Dice kiwifruit into small cubes.
Put all of the ingredients into a bowl and mix gently. Refrigerate for 1 hour before serving so the flavours can blend together.  Serve with chips or as a side to chicken or fish (or in fish tacos!).


August 10, 2011

Ramadan # 3 Spinach and Almond Pesto with Fresh Mozzarella and Garlic Shrimp

O Allah, I seek your forgiveness for every sin that leaves grief in its wake, that causes remorse, that holds back sustenance, and that prevents acceptance of [my] prayers.

I really enjoy creating pasta-based concoctions in my kitchen. I usually stick with one type of pasta in my dishes, but lately I've been mixing different flour-based or vegetable-based pastas, trying to find combinations that work and that my family will eat.  One combination that I like is an equal blend of white and whole wheat pastas because you get the heartiness of the whole wheat pasta without having the dish become too heavy and dense.


A while back, I came across a blog post on pesto. The recipe was surprisingly easy and didn't require Parmesan cheese (it's hard to find Parmesan cheese without rennet in it). I tagged this recipe under "Recipes to Try ASAP" and let it be.  A couple of weeks ago, I came back to this recipe and thought I would test it out.   I changed the recipe by using almonds instead of walnuts, mixing up the pasta and adding fresh mozzarella and shrimp.


Spinach and Almond Pesto with Fresh Mozzarella and Garlic Shrimp
 

2 big handfuls of fresh baby spinach, stems removed and washed and dried
1/4 cup of almonds, skin removed
4 tbsp freshly minced garlic,
10 basil leaves, washed
4 tbsp olive oil
6 small fresh mozzarella balls, drained of liquid and sliced into quarters
15-20 frozen raw peeled and deveined shrimp, thawed and washed
1.5 cups dry whole wheat rotini pasta
1.5 cups dry white rotini pasta
salt and pepper to taste

In a food process,  mix together spinach, almonds,  3 tbsp garlic, 8 basil leaves, 2 tbsp olive oil, salt and pepper until a gritty-like texture is formed.  Taste for salt and pepper.  If a stronger flavour is desired, add more spinach, basil and almonds and give the mixture a spin in the processor.

In a frying pan, add the remaining olive oil, 1 tbsp of garlic and the 2 basil leaves (torn up into small pieces).  Saute on low-medium heat for 1 minute.  Add in the shrimp and cook until the shrimp have curled in a bit and are pink all the way through.  Season with some salt and pepper before removing from heat.

Cook the dry whole wheat and white pastas (SEPARATELY) according to box instructions.  Strain the water and mix the pasta in a large bowl with the pesto. Gently mix in the mozzarella quarters and shrimp. Taste the pasta for seasoning and add salt and pepper if necessary.  Drizzle a little bit of olive oil on top.  Serve immediately or refrigerate for a later time.


August 4, 2011

Ramadan # 2: Stuffed Puff Pastry

O Allah I seek Your forgiveness for every sin that kills the heart, and incites anxiety, and preoccupies the mind, and pleases Satan, and angers the All-Merciful
------------------------------------------------------------------------------------------------------------------


I truly believe that the grocery stores here in Pasadena are conspiring against me.  I have been looking high and low for freshly mixed bakery pizza dough since we followed R's work assignment from TO to Fairfax to LA  and to date I HAVEN'T found any!!!  It is in my humble opinion that when the grocery store clerks see me coming, they run quickly to the bakery section and remove the bagged pizza dough...lol. I've searched Ralph's, Fresh and Easy, and Target, but I have always come back empty handed.

Why don't you just make your own you ask? Well, there are a few things that intimidate me and working with yeast is one of them.  I've heard, or rather read, horror stories that involve yeast and I'm not sure if I want to have one of my own.  Isn't yeast temperamental?  It can't be old, has to be mixed with water at the correct temperature etc.  That's why I like using the freshly mixed pizza dough that's available at home in Toronto at Loblaws or Supercentre. The bakers mix it fresh in-house every few days and it isn't chock full of preservatives. They also have the option of white or whole wheat dough which is nice.

This Ramadan, I wanted to stay away from the samosas and make something different for iftar (the small snack(s) that is eaten to break the fast). I was thinking of small pizza pockets, but BECAUSE I couldn't find the dough anywhere, I opted for puff pastry. Pizza is a great meal and has the potential of being healthy if you select good ingredients. You can cover most, if not all of the food groups based on what you choose.  For me, I love having lean ground beef, tomatoes, onions, olives, jalapeno peppers, green peppers, and mushrooms on my pizza. I do like to add pineapple, but because most of my family don't like having the sweet and savory flavour, it's usually omitted from the pizza.


Since I wanted to make individual portions, I used pre-cut, 5"x5" puff pastry squares for the crust. For the filling I used dum keema (steamed ground beef-I'll post this recipe later), hot salsa, sliced tomatoes, low-fat shredded cheese, olives and onions.  I also made a vegetarian pizza pocket, using methi palak (cooked spinach with fenugreek).

People say that when you're making crepes, the first one is always bad, well I had a similar experience while trying to fold over my first pizza pocket.  I didn't know how to fold it and keep the filing inside, so I ended up having a really bad looking pocket with pieces of filling stuck to the edges.  After thinking about it for a few seconds, I had a Martha Stewart moment and tried using the tines of a fork. Success!  I now had a completely sealed pocket that looked pretty.

Puff Pastry Pizza Pocket 
(try saying that 5 times in a row!)

1 pack of pre-cut 5"x5" puff pastry squares, thawed as per package instructions
1 cup cooked dum keema (ground beef) or any cooked ground beef/chicken/turkey or 1 cup of cooked spinach  if you want to make vegetarian pizza pockets
1 cup shredded, low fat cheddar cheese
1 onion, thinly sliced
1 jar of hot salsa
a handful of sliced olives, drained
a handful of sliced yellow grape tomatoes, washed and dried
1 egg, beaten
1 tsp cold water

Pre-heat the oven to 350 degrees.**

Line a cookie sheet with parchment paper and set aside.

Place a sheet of parchment paper on your counter. This will be your work surface.  Lay one puff pastry square on the parchment. Place 1 tsp of salsa on the pastry and spread it out. Lay on 1 tablespoon of keema in the centre of your puff pastry square. Layer some cheese, a few slices of onion, olives and tomato slices on top of the keema. Sprinkle the filling with cheese.  Bring one corner of the puff pastry square and match it up with the corner diagonally across from it so that the square becomes a triangle.  Using the tines of a fork, press down gently to seal the puff pastry.  Using a spatula, carefully lift the pizza pocket and place it onto the parchment-lined cookie sheet.  Continue the same process until you have made all of your pizza pockets.

In a small bowl, beat 1 egg and 1 tsp of water together. Using a pastry brush, brush the top and sides of the pizza pockets with the egg wash. This will create a nice golden colour on your pizza pockets.

Put the cookie sheet into the 350 degree oven until the pastry is puffed up and golden brown.   Serve with ketchup or green chutney.

** If you don't want to make the pizza pockets right away, you can freeze them in a freezer bag layered between wax paper.  Skip the egg wash until you are ready to bake them.